8 Morning Stretches For Perfect Posture
We have all head the phrase “bad posture” or even “text neck”. Whether it be from nagging parents, fitness instructors, or chiropractors, it is a phenomenon that affects just about everyone. Now days we spend 8-12 hours a day hunching over our desks and devices, go home and spend an additional hour or two on the couch to “unwind and relax”. However, our bodies were not designed for these actions over prolonged periods of time. Due to these unnatural positions, our muscles change their shape to adjust to the new posture. As this is not their optimal form, there is pain and unnecessary strain placed on these muscles. The back and neck muscles generally end up in stretched positions for long periods of time, whilst the chest and throat muscles are shortened. This in turn reduces the muscle’s functionality and leaves us in a world of discomfort.
Not only does bad posture affect your mechanical structure, it impacts a wide range of physiological aspects. The production of hormones and blood circulation ends up malfunctioning and it may take years before we see the side effects. Our bodies may associate the hunched over (closed) posture with stress. This results in a release of cortisol. This hormone is used to help us get out of stressful environments by increasing heart rate, blood pressure, blood glucose, breathing rate and muscle tension. This is in anticipation of “Fight or Flight mode”. Open and relaxed posture, on the other hand, can release endorphins (sometimes even testosterone) to prevent stress and in turn create feelings of confidence. You may have not realised it, but your posture affects more than just your height. It affects your overall health and wellbeing. As with most things, once a habit is formed, it is hard to break. Bad posture in a chronic problem and can not be fixed overnight. We need to stretch and strengthen the affected muscles to enable us to stand up straight and reach our full potential once again. With that being said, an easy way to stretch out the muscles, get a good amount of blood flowing, loosen up tight muscles and increase body awareness is to try these poses first thing in the morning.

#1 Extended Child’s Pose
Level: Beginner
Muscles worked: Shoulders, core, lower back and hip flexors
How to do it:
Start on your hands and knees.
Widen your knees as far as shoulder-width apart.
Keeping the bottoms of your feet facing the ceiling, touch your big toes to each other.
Crawl your hands forward, and either extend your arms straight out toward the front of the mat or drape your arms on the floor alongside your body.
Slowly start to drop your hips back to rest on your heels.
Rest your forehead on the floor.
Breathe here for 5 to 10 deep breathes.
Why it works: Child’s Pose helps you explore the range of motion in your shoulders by stretching your arms above your head. It also helps lengthen and stretch the spine, which is used to being slouched after years of bad posture.
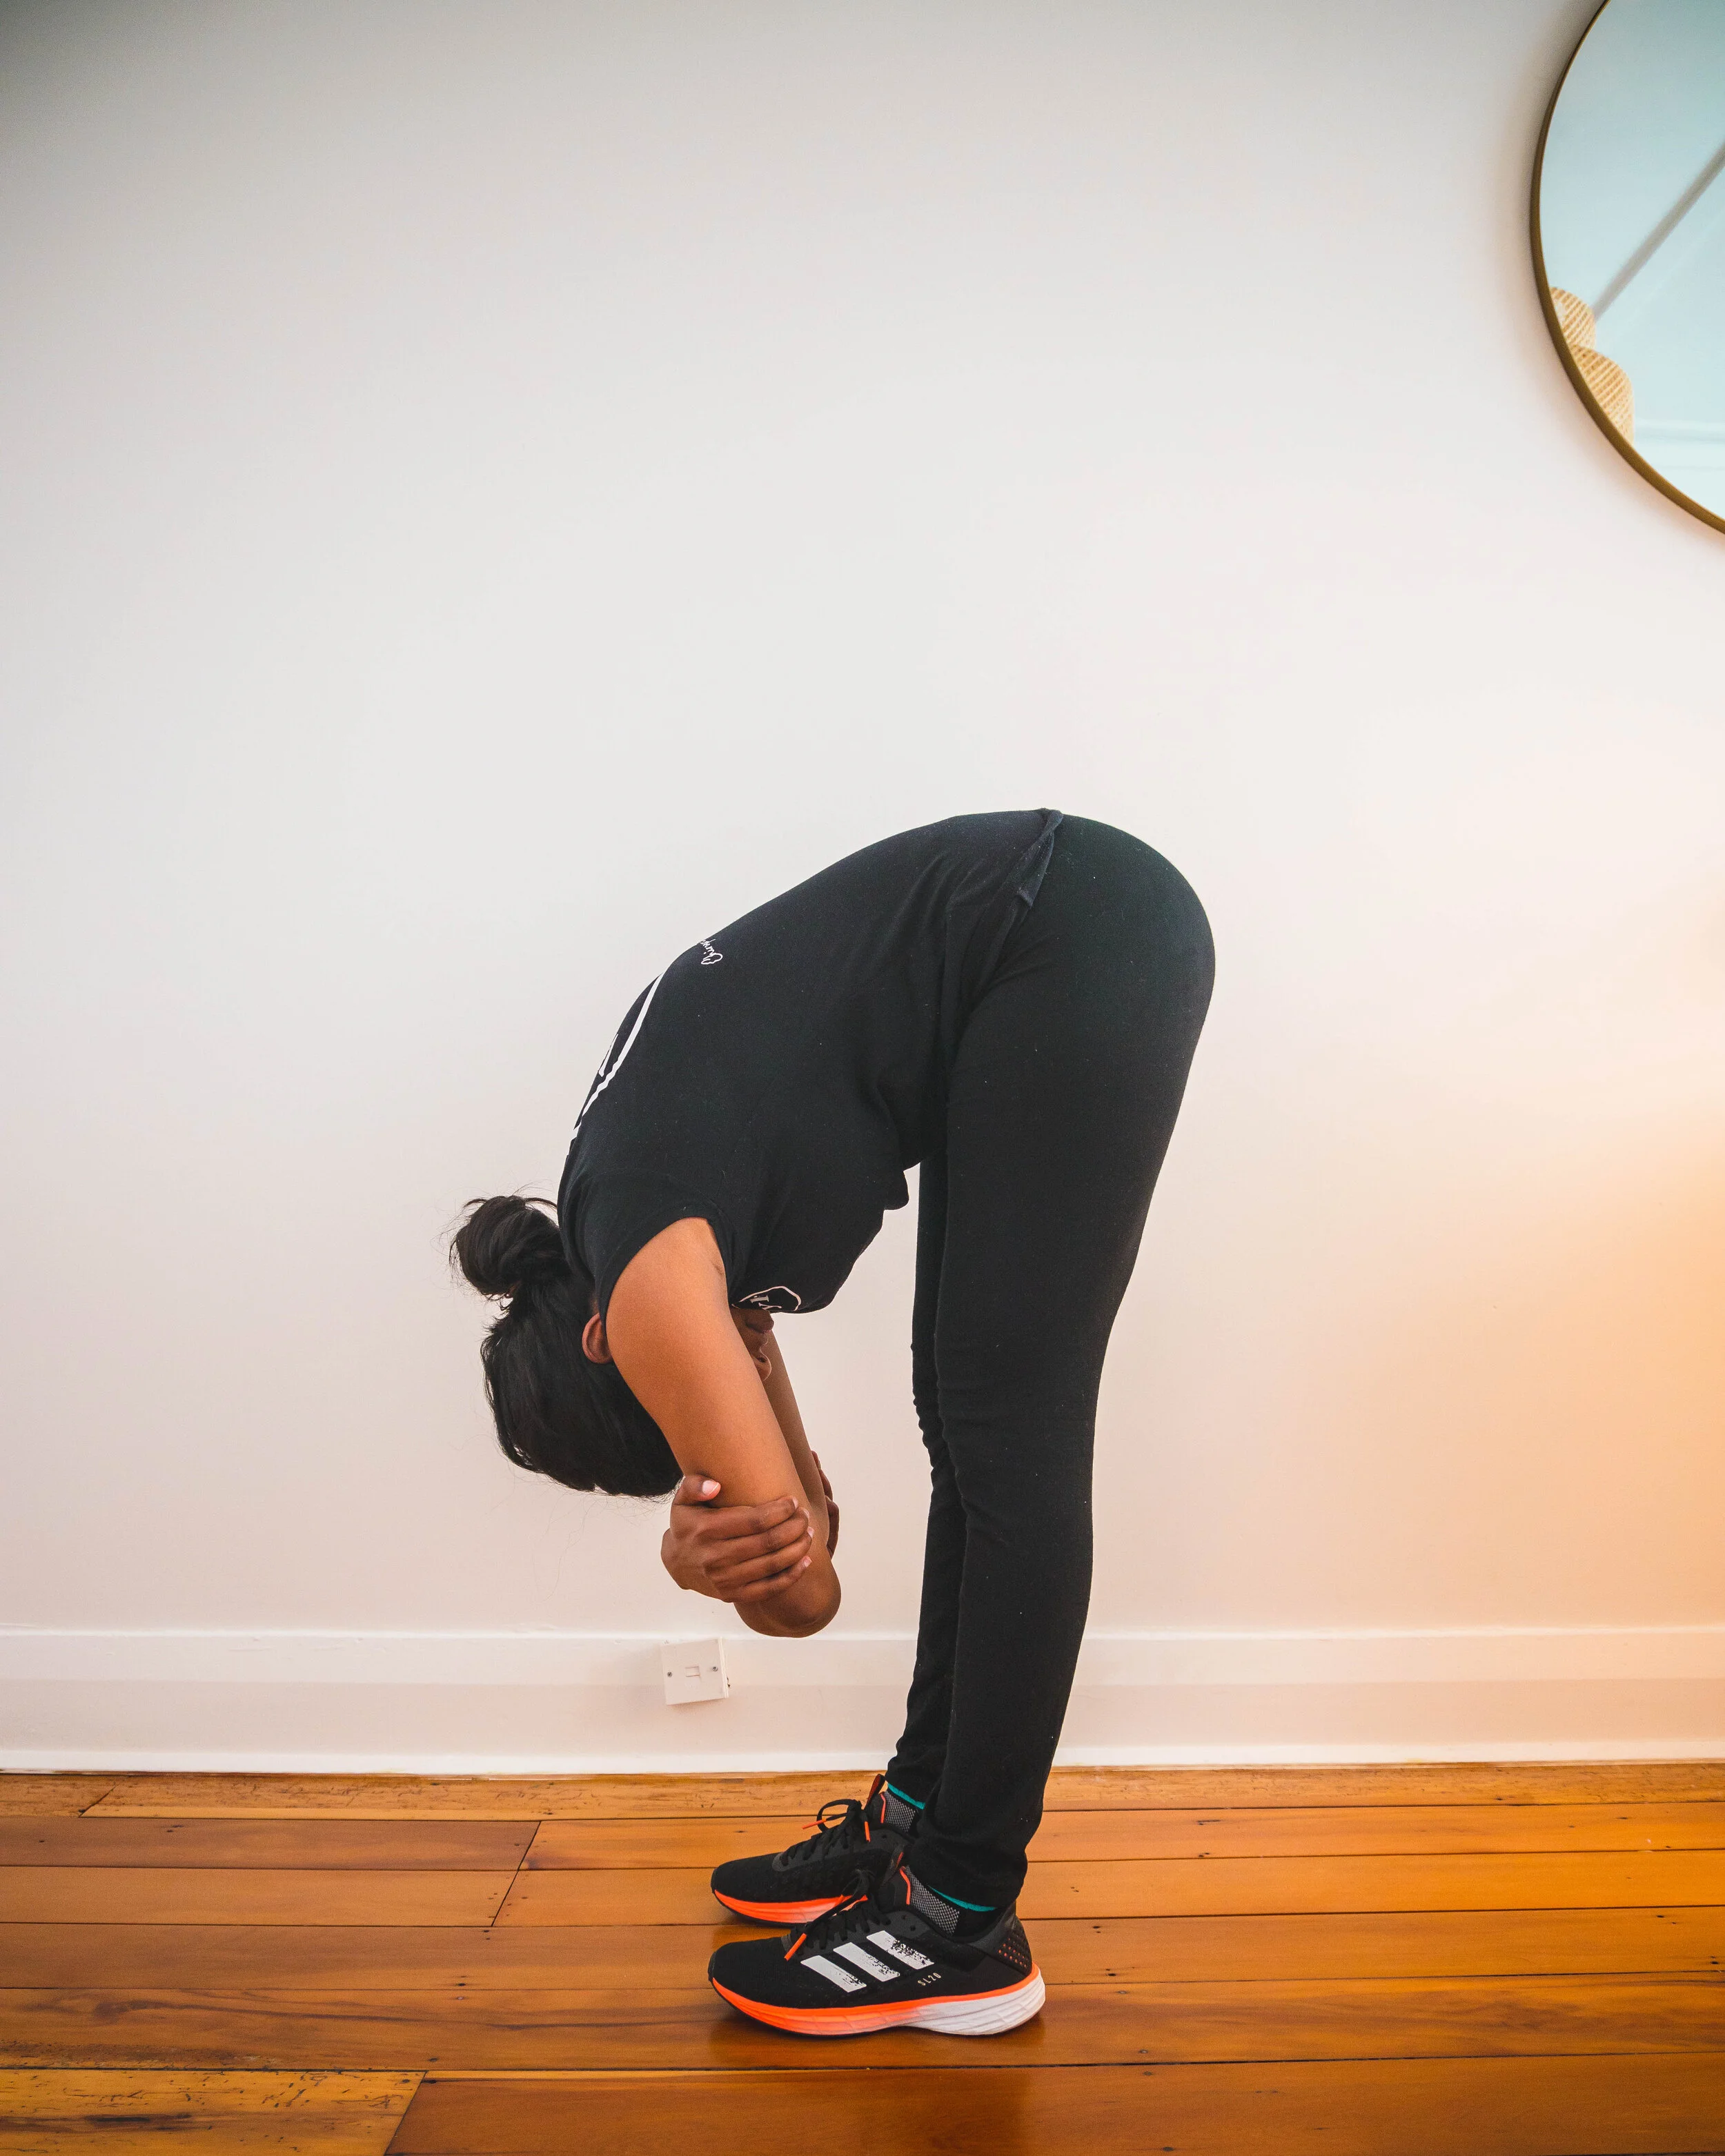
#2 Standing Forward Fold
Level: Beginner
Muscles worked: Neck, shoulders, hamstrin
How to do it:
Start with feet hip-width apart.
With a generous bend in your knees to support and balance your body’s shape, exhale as you bend forward at your hips, lengthening the front of your torso.
Bend your elbows. Hold on to each elbow with the opposite hand. Let the crown of your head hang down. Press your heels into the floor as you lift your sitting bones toward the ceiling.
Pull your shoulders away from your ears. Drop your head and neck.
Lengthen your legs until you feel a stretch in the hamstring muscle. Work on engaging your quadriceps muscle to help hamstring muscles release.
If you can keep the front of your torso long and your knees straight, place your palms or fingertips on the floor beside your feet.
Release deeper into the pose with each exhalation. Let your head
Hold the pose for 4 breath cycles.
Why it works: This fold deeply stretches the hamstrings, opens the hips, and can help release any tension in the neck and shoulders. This can be an intense stretch for the hamstrings, so be careful not to take it too far. Instead, allow the tension in your shoulders to roll out.

#3 Cat-Cow Pose
Level: Beginner
Muscles worked: Back, chest, abdominals
How to do it:
Start on all fours. Your wrists should be stacked under your elbows, which are stacked under your shoulders. Keep your fingers spread against the ground for increased stability. Keep your knees stacked under your hips, toes untucked, with the top of your feet pressed into the ground.
Lengthen from your tailbone down to your head, so that your neck is neutral and you’re looking down a few inches from your finger. This is your starting position.
Begin the Cat phase. As you exhale, tuck your tailbone under, using your abdominal muscles to push your spine toward the ceiling, making the shape of a Halloween cat. Lengthen your neck. Allow your head to reach toward your chest so that your ears come down by your biceps.
On an exhale breath, “swoop and scoop” the pelvis into Cow position so that your belly is dropped toward the floor. Lift your chin and chest and gaze up toward the ceiling. Broaden your shoulder blades. Draw your shoulders away from your ears.
Cycle through Cat-Cow a few times. Be careful to avoid putting stress and pressure on your head and neck.
Why it works: This movement sequence will help increase spinal awareness, which is a large part of less-than-perfect posture.

#4 Standing Cat-Cow
Level: Intermediate
Muscles worked: Back, chest, abdominals, legs
How to do it:
With your legs hip-width apart and knees bent, place hands either out in front of you or on your thighs for added balance.
Keep your legs static. Begin the Cat (upward) phase: As you exhale, tuck your tailbone under using your abdominal muscles to push your spine toward the ceiling, making the shape of a Halloween cat. Lengthen your neck. Allow your head to reach toward your chest, maintaining alignment with the spine.
On an exhale breath, “swoop and scoop” the pelvis into Cow position so that your belly is dropped toward the floor. Lift your chin and chest and gaze up toward the ceiling. Broaden your shoulder blades and draw your shoulders away from your ears.
Cycle through Standing Cat-Cow a few times.
Why it works: This stretch activates different back muscles. It can help increase your awareness of your back in relation to the rest of your body. If your job requires you to be in the same position every day, take a break and cycle through Standing Cat-Cow a few times to help counteract the effects of sitting all day.

#5 Reverse plank
Level: Intermediate
Muscles worked: Abdominals, lower back, hamstrings, glutes
How to do it:
Sit on the floor with your legs extended in front of you.
Place your palms, with fingers spread wide, on the floor slightly behind and outside your hips.
Press into your palms and lift your hips and torso toward the ceiling.
Look up to the ceiling, point your toes, and keep your arms and legs straight.
Keep your entire body strong and form a straight line from your head to your heels.
Squeeze your core and try to pull your belly button back toward your spine. Hold the position for up to 5 breath cycles.
If your hips begin to sag or drop, lower yourself back to the floor.
Do 3-5 rounds of 5 breath cycles.
Why it works: The reverse plank is an often-overlooked exercise that is great for the core. It targets the posterior muscles (those along the backside of the body), but when done properly, it also engages the abdominal muscles. Beginners should start with learning the regular plank. Progress to holding the reverse plank for just a few seconds at a time with good form.
Extra Stretches:
#6 Downward-Facing Dog
Level: Intermediate
Muscles worked: Hamstrings, hips, calves
How to do it:
Begin on all fours.
Tuck your toes and lift your hips high, lifting your sitting bones toward the ceiling.
Reach your heels back toward the mat without allowing them to plank on the ground.
Drop your head and lengthen your neck.
As you stay here, make sure that your wrist creases stay parallel to the front edge of the mat. To alleviate the pressure on your wrists, press into the knuckles of your forefinger and thumbs.
Breathe here for at least 3 deep breaths.
Why it works: It works to open out the chest and shoulders, which are generally rounded due to excessive desk work. Practice often, and you might be able to relieve neck and back pain associated with poor posture. You might even find yourself sitting up a little straighter, too.
Remember to actively draw your shoulder blades back and create a space in your neck. If you find yourself scrunching your shoulder up to your ears, it may mean you don’t have enough upper body strength. If your shoulder blades begin to tense up, bend your knees and go into Child’s Pose, and rest until you’re ready to hold the position again.
#7 Thoracic Spine Rotation
Level: Intermediate
Muscles worked: Back, chest, abdominals
How to do it:
Start on all fours, with your fingers spread slightly.
Place your left hand behind your head, but keep your right hand outstretched on the ground in front of you with fingers spread.
Rotate your left elbow to the sky while exhaling, stretching the front of your torso, and hold for a deep breath, in and out.
Return to the starting position. Repeat for 5 to 10 breaths.
Switch arms and repeat.
Why it works: This exercise stretches and improves mobility in your torso, specifically your thoracic spine (the middle and upper back). It also reduces stiffness in the mid to lower back. Thoracic spine mobility is extremely important for loosening tightness in the back muscles.
#8 Standing Child’s Pose
Level: Intermediate
Muscles worked: Upper back, shoulders, chest, core, lower back and hip flexors
How to do it:
Start standing and facing a wall about a half metre in front of you (you can always move forward a little).
Make sure your feet are in line with your hips.
Lean towards the wall with your arms up, until you can start resting your forearms onto the wall.
Lower your chest downwards away from your ears and shoulders. Try to rotate your shoulders outwardly.
Hold the position for 3 breaths and start again.
You can also put your hands together behind your head with your triceps against the wall for a deeper stretch.
Why it works: This version is easy on the knees whilst being able to stretch deeper into the chest and triceps.
References